
The Quilotoa Loop. One of the most popular natural sights to visit in Ecuador, and it is not hard to see why. It is accessible as a day trip or a day hike, but what better way to visit than by hiking the Quilotoa Loop over 3 days?
And then around the Quilotoa crater….but we will get to that later. This was my first hiking trip since restrictions ended in Ecuador, so it was a bit of a shock to the system! Yes, you get to stay in hostels if you choose to do so, and it is not too high but as always, go prepared!
This Quilotoa hiking guide is based on the following route:
sigchos-insilivi-chugchilan-quilotoa lake
Day One
Day Two
Day Three
Day Four
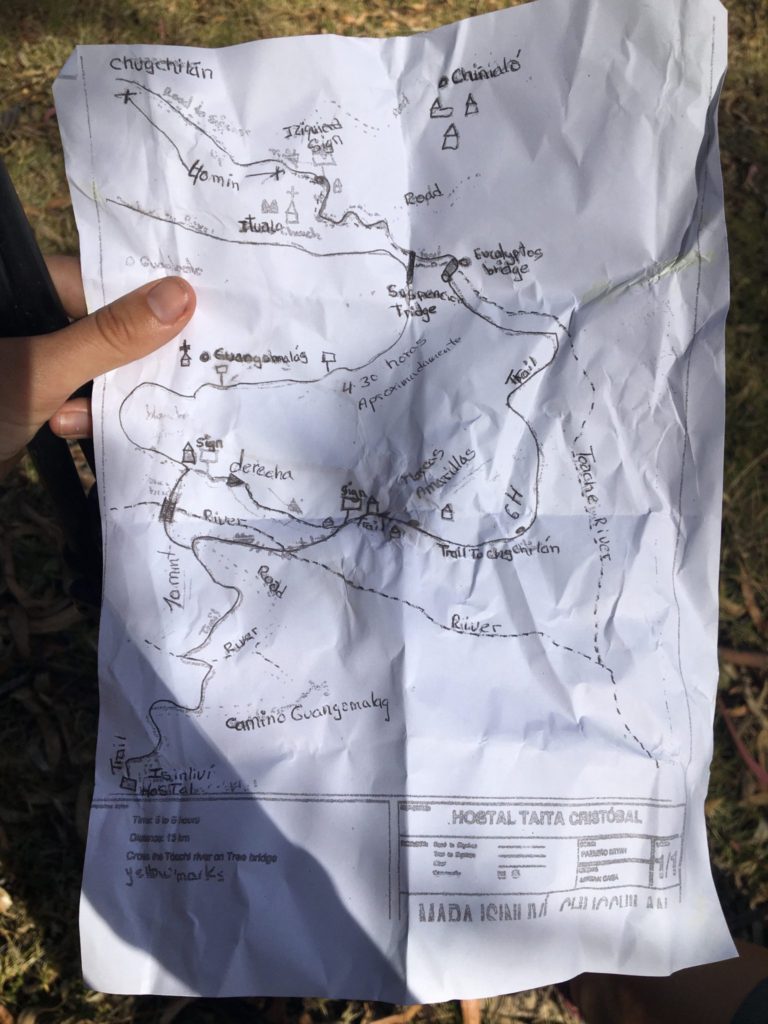
After reading many posts about good signage, bad signage… I wanted to give an update. Personally, I think it is still possible to get lost on this Quilotoa Loop itinerary from Sigchos, but an offline GPS app such as Maps.me will help prevent that from happening.
Below, I have outlined some places we got lost along the way to help others, but in summary, follow the yellow and red signs- NOT specific hostel signs (unless it is by Hostel Cloud Forest).
As always, keep up to date with government advice, have a mask ready to pass through communities, and follow hostel protocols. For us, this ranged from being sprayed with disinfectant to just cleaning our boots/ hands before entering. We were the only hikers for the first two days and the first hikers in some accommodations for six months in September 2020. Now more people are hiking again.
SKIP TO quilotoa loop FAQ:
How much does it cost?
Can you camp?
What is the accommodation like?
Where should I stay?
How fit do you need to be?
Is it safe?
Will I get lost?
How do I get there?
What is the weather like?
What is the elevation of the quilotoa loop?
Are there other quilotoa hikes?
Can You swim at quilotoa lake?
quilotoa loop packing list (Coming soon)
day One
sigchos (2850m)-insiliv (2950m)
Distance: 9.8km-14km (dependable on detours)
descent/ascent: 430m
Start point: After ten minutes of being directed in different directions, Maps.Me saved the day with its mark for the start point for the Quilotoa trail to Insiliv. Some people start in the main plaza, but if you ask for the camping area ‘the Starlight Inn’ (accessed by walking South on Sigchillas road), you will soon see signs for Insilivi. To the left; car access, to the right; the trail.
The missing sign: And so it begins. Rolling hills, farmland, and looming mountains will soon greet you. The signing was easy enough until we reached a sign on the left for Sigchos. To the left of the main trail was a green unsuspecting trail heading down into the valley. No sign, but a sign on the right. See the photo below.
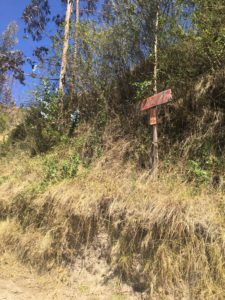
I have since read that there was a sign saying do not turn right. At the time of our hike, this was not present.
So follow the main trail? Or follow the green trail? We should have referred to our GPS but were feeling confident.
We took the main trail and ended up adding about 2kms to our journey. After finally realising that there was no way down, we walked back. In summary, take the left grass trail down into the valley!
Once you have reached the valley, immediately cross the river. This is the quickest way. We followed the path to the right instead, keeping the river to our left.
Why? We merrily followed the signs. You can still cross later on, as there is another bridge with a signpost. Either way, you will join the same trail once the path crosses the river and starts ascending the hill.
When you reach a sign to ‘Hostal Estela’ and a walker sign, TURN LEFT. We presumed ‘Hostal Estela’ was also directing us to Insilivi. This is not correct, and again we realized this after taking a mini detour.
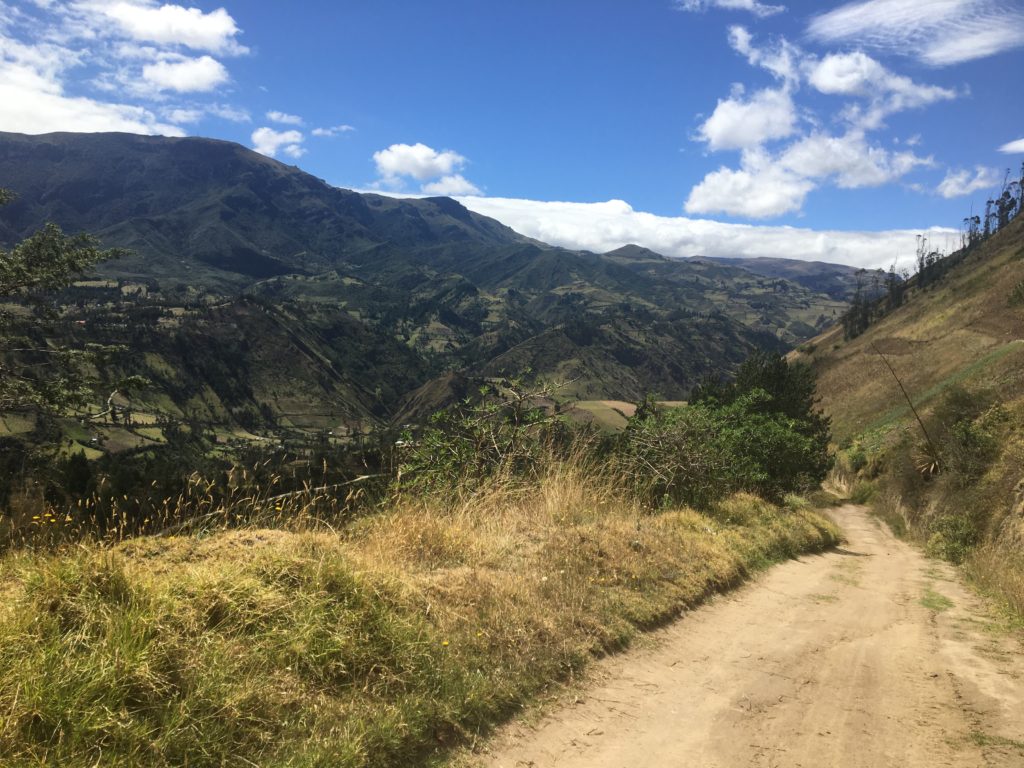
The rest of this day is all about the ascent. It is mainly via switchbacks, then following the main road, until another footpath takes you to Insivili. You can follow the road the whole way, but it takes longer.
insiliv Accommodation options:
We stayed in Hostel Taita Cristobal for 15$ each. It was clean and cosy. It included a three-course (vegetarian included) dinner, tea, and a substantial breakfast.
Lunch options: $3 for a lunch box. $1 for a sandwich.
Hostal Juju Llama is another option that is very popular with travellers. It was closed for renovation and due to open in November 2020 at the time of writing.
hiking the quilotoa loop Top tip:
pack a clean pair of warm clothes for the evening. Whilst most accommodations have fireplaces and many blankets, it can still feel cold, especially if there is no heat source in your room.
day two
insilivi (2950m) to chugchilán (3200m)
Distance: 12-15km dependable on the route taken
time: 4.5-7 hours
ascent/descent: 570m
So, there are many route options throughout the hike to Quilotoa lake. There are two main route options from Insilivi to Chugchilán; a 4.5 hour or 6.5 hour (more or less) option. Apparently, the 6.5-hour option is more scenic. However, the way we took (a combination) had incredible views.
The first five minutes of the hike are when you can get lost today. On the trail, we decided to take turns off the main road just after the houses, along a grassy trail down into the valley. Signage improved once we crossed the concrete bridge. Keep following the signs back up the mountain. Incredible views will soon greet you!
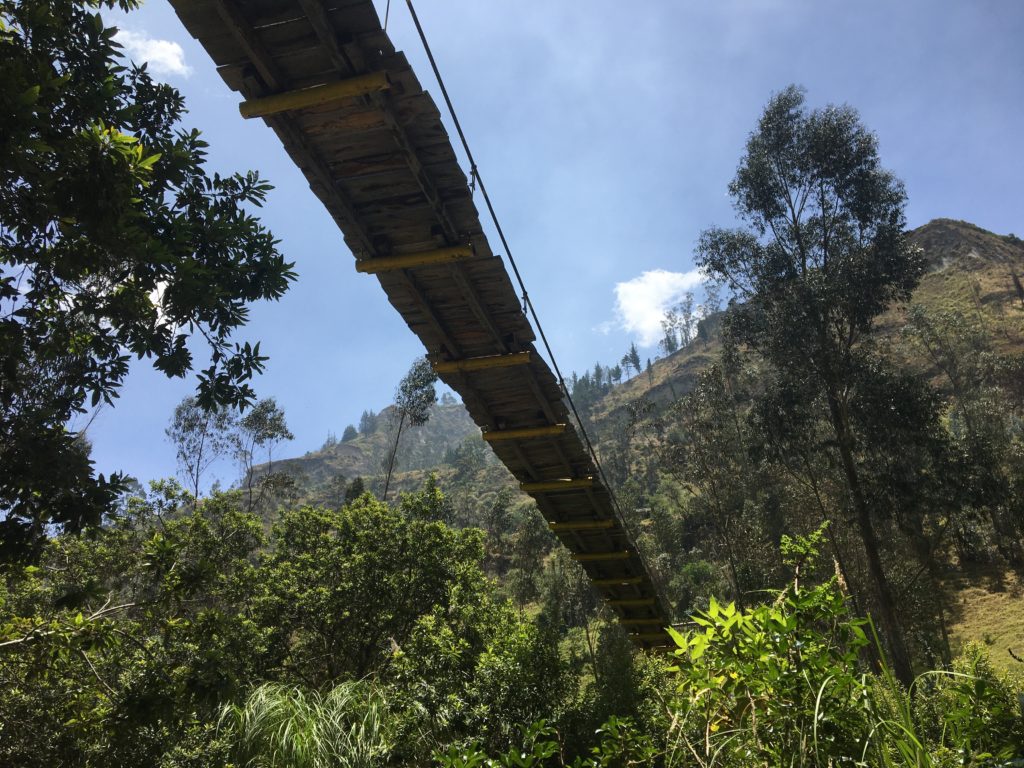
The trail was easy to follow from this point onwards and heads back down into the valley to a wooden suspension bridge. This is the perfect shaded spot for lunch also.
After this, the path leads up past a cafe (sadly closed when we passed due to the lack of visitors hiking the Quilotoa loop) and into a small community. By the water taps, you have the option to ascend here to the right or follow the official trail that takes you through the village first, then turns right. I would suggest taking this route.
Once you reach the top of the mountain, enjoy the mirador views before following the trail into Chugchilan.
Word of warning: This part goes on for a long time, as the town is spread along the main road, but it means slightly less walking tomorrow.
chugchilán Accommodation options:
We stayed in Mama Hilda. It was $25 each, and they cooked the most delicious food. We had so much for breakfast; we actually took the bread, cheese, and eggs for lunch. Normally their lunchbox is $8, but they did not have it available due to the limited amount of tourists. There are also shops in town if you want to buy snacks.
A popular option is the Hostel Cloud Forest. This is $15 each and what is awesome is that they created many of the signposts along the way. Thank you!
hiking the quilotoa loop; top tip:
if you are interested in hiking around the crater, be prepared for unpredictable weather. We decided to wait until the night before to decide whether to hike on the 4th day.
tips for Hiking solo as a woman
day three
chugchilán (3200m) to quilotoa lake (highest point- 3930m)
Distance: 10km
time: 5-8 hours
ascent/descent: 930m
From Chugchilán, the route to Quilotoa lake is well signposted. There are two options, either hike via Guayama San Pedro or Gran Guayrama (.5km shorter). We missed the turn for Gran Guayrama but easily found our way via San Pedro.
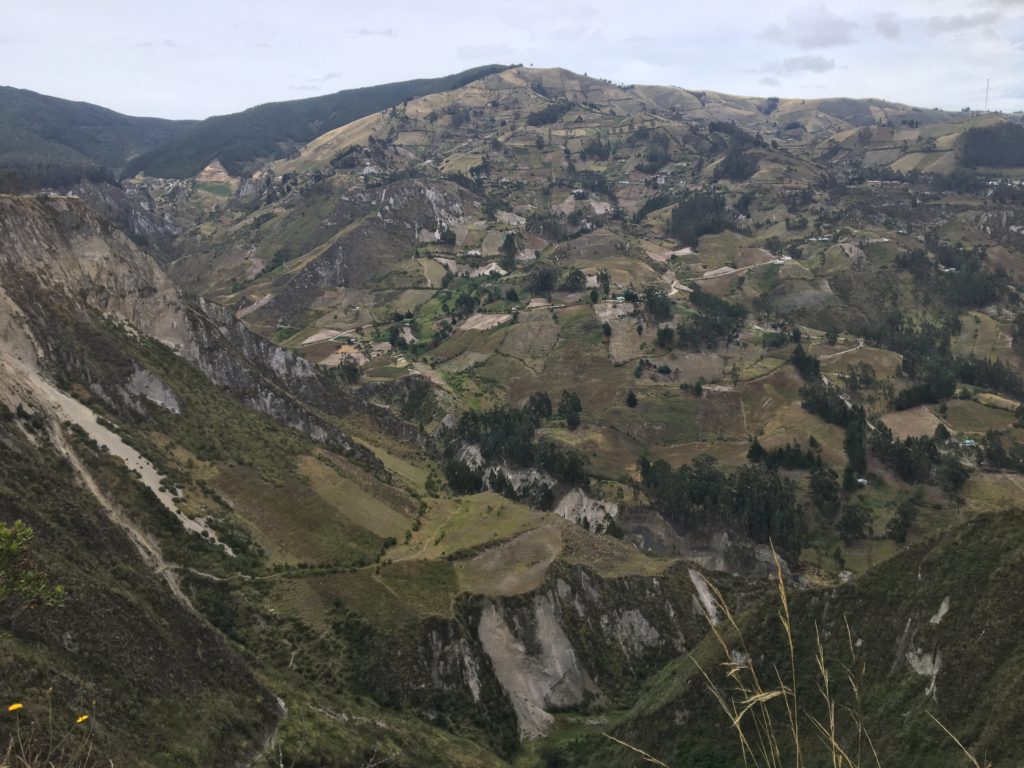
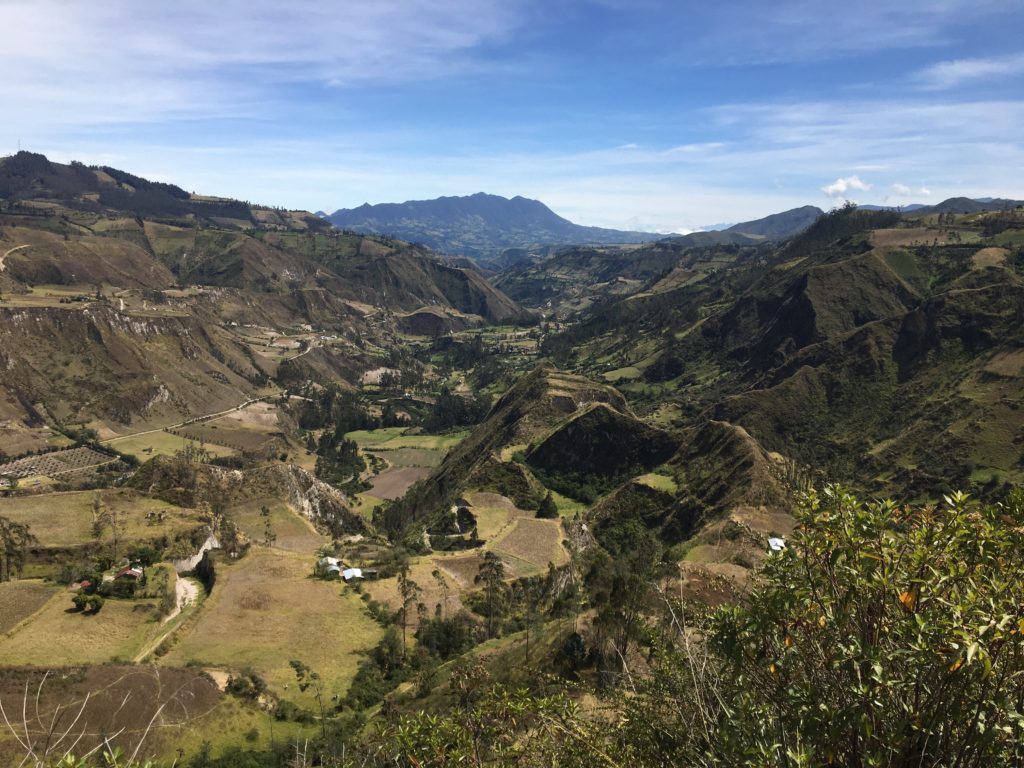
As is the case throughout the hike, the landscape and valleys change. Green hues deepen, and mountains steepen. There are two main ascents today. Take your time and enjoy the views.
If you follow a GPS route, such as Maps.me, it will take you a quicker but steeper way up to the Quilotoa crater. It is harder to follow the trail here, and you have to pass through two barbed wire gates. The trail goes around the west of the crater before you reach the rim.
The positive of this route is that it brings you closer to the village. However, you see less of the crater and lake than if you take the signposted route. While the GPS route is supposedly faster, the signposted route is simpler to follow and is in switchbacks, making it easier to ascend at altitude.
Quilotoa Accommodation option:
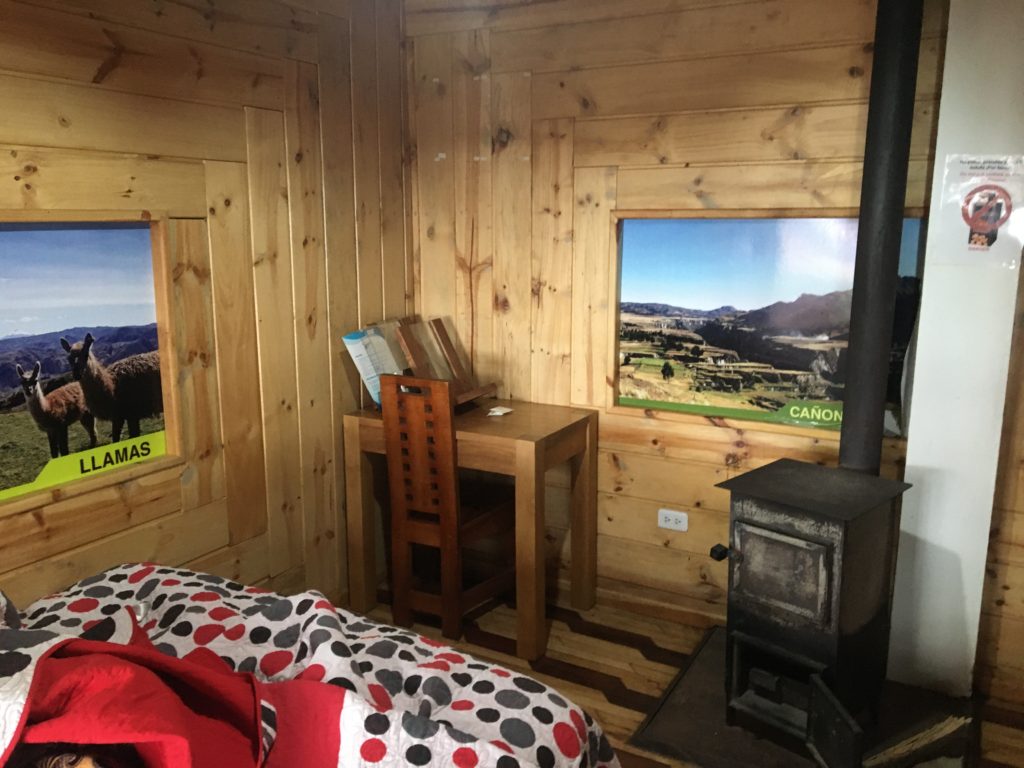
If you decide to hike around Quilotoa lake, you stay in Quilotoa. Prices are higher, and it can be cold. And I mean cold. We stayed in Hostal Chukirawa and got two rooms for $25 each. This included a two-course dinner and breakfast. There is a stove in each bedroom for warmth.
Please note this price was during the low rona season.
Hiking the quilotoa loop top tip:
Snacks! Fuel your hike and manage altitude sickness with snacks. Bring them with you, or purchase them in the town you stay in.
day FOUR
hike around quilotoa crater
Distance: 10.30 km (more or less)
time: 4-6 hours
ascent/descent: 761m
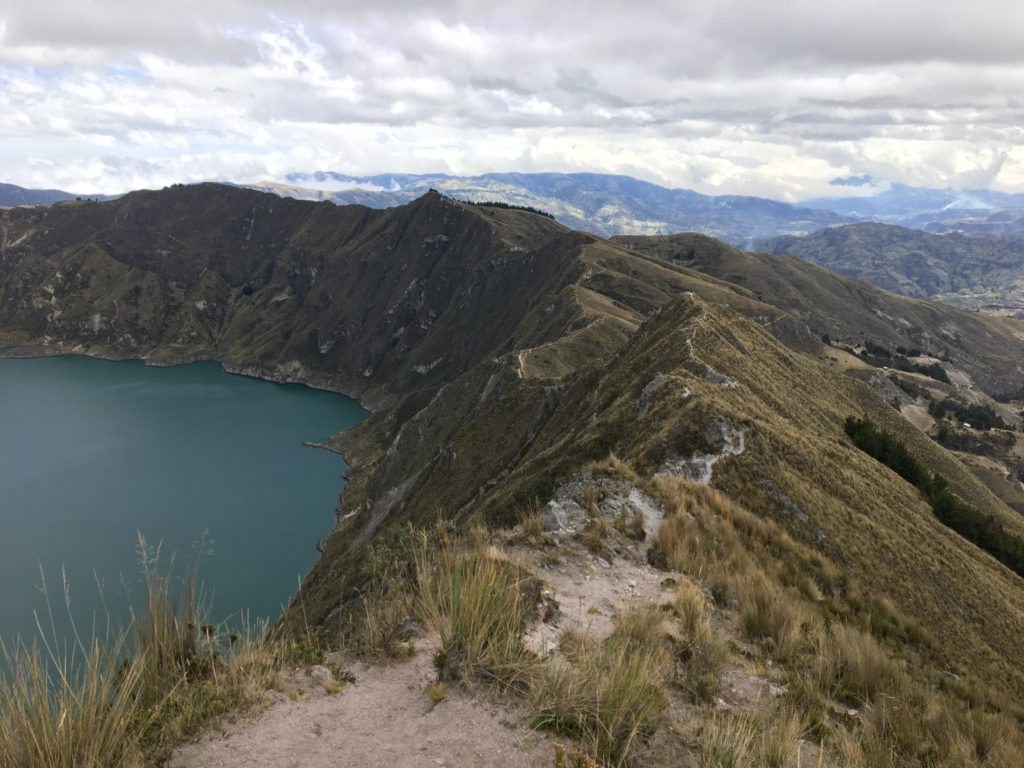
We decided to hike around the crater rim as it was dry (but freezing). Hike clockwise for an easier ascent/ descent, or hike anti-clockwise for a slightly quicker but more challenging hike.
This day is pretty self-explanatory, and the way is mostly clear. Wrap up warm, take enough water (2-3 liters minimum- a hot water flask would be nice), and only take what you need.
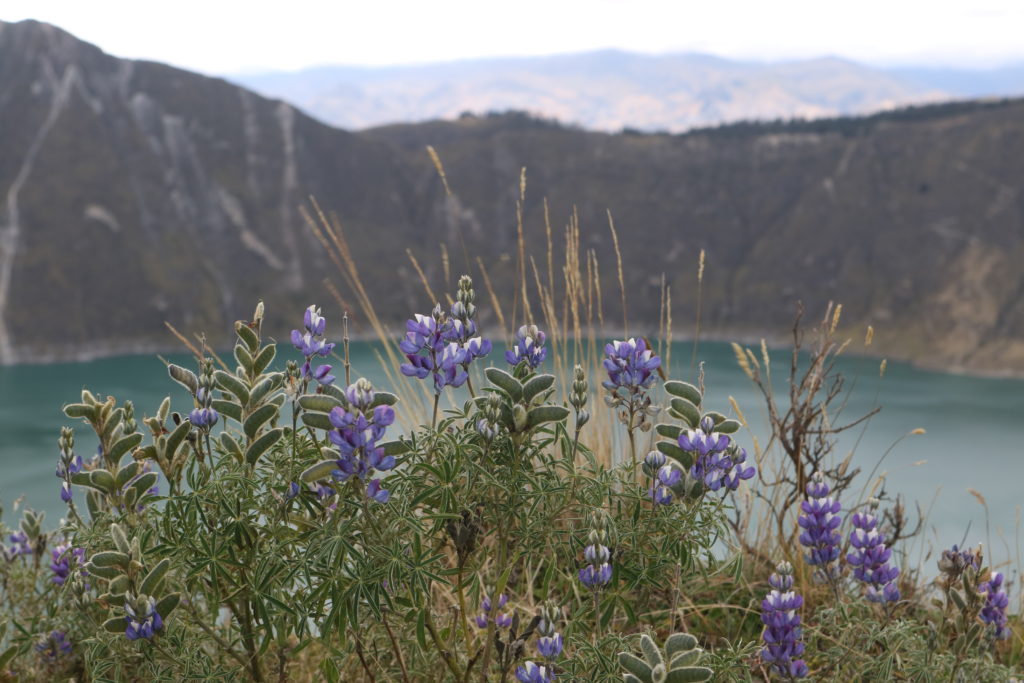
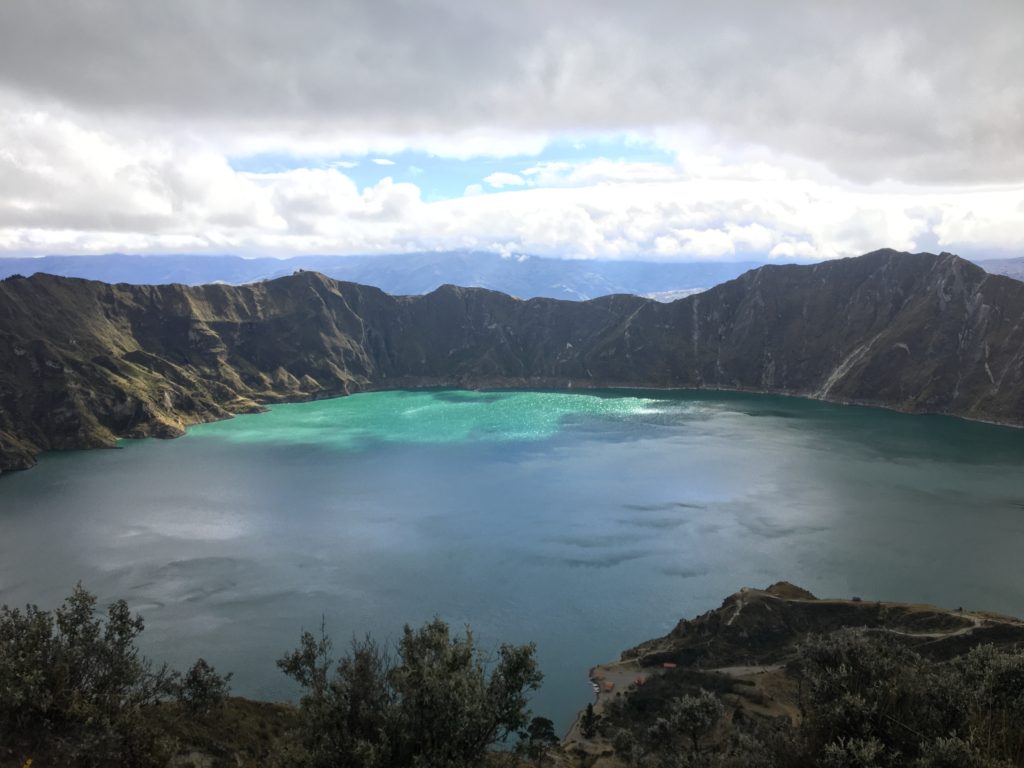
Personally, hiking the Quilotoa Loop did not feel complete without walking around the lake. It can be extremely windy and cold, but it is beautiful to see how the sun dances across the lake to create turquoise hues and see the surrounding scenery.
The highest elevation of the Quilotoa Loop is today, at 3930m. It is marked by a sign.
Fun fact: There is a lovely mirador of Quilotoa lake called ‘El Torre’, which you will come across on the hike around the crater. The local community funded the project, and it is a nice place to sit. Usually, there is a small fee to walk on the platform for the viewpoint.
quilotoa loop FAQ:
How much does The Quilotoa Loop cost?
I wish there was an easy answer to this question. If you stay in hostels, bring your own snacks and do not have a guide, then a maximum of $150. We had our own transport, and I had a filter bottle for water, so costs were minimum ($100 including petrol and tolls). We also just brought snacks for lunch or took leftovers from breakfast.
You can do this hike relatively easily independently. However, if you would like a guide, there are guided tours for hiking the Quilotoa Loop in three days. This is a more expensive option. It is recommended to visit agencies in nearby towns like Latacunga to negotiate a price instead of pre-booking online.
Can you camp on the quilotoa loop?
Yes. There are campsites, and often hostels allow people to camp on their grounds also. I would have camped if I was solo, but I also felt it was good to support the hostels during this difficult time.
There are also plenty of places to wild camp; just be aware that hiking along the Quilotoa crater is exposed and cold. Try to camp in one of the lower areas with more shelter.
What is the accommodation like?
Well, it depends where you go! But in general, Quilotoa Loop hostels are simple, clean and welcoming. Usually, you have your own room, and most accommodations also offer a private bathroom.
Some rooms have stoves which make it nice and warm. Regardless expect lots of blankets on the bed. There is usually a communal area where you eat which also has a stove, and in normal times, it is a great place to meet other travellers.
Accommodation includes food. Overall the standard was good. Filtered water is not necessarily included. Boiled water may be offered, along with tea and coffee.
Knowing some basic Spanish phrases is useful and nice to connect more with locals and the hostel owners.
Where should I stay on the quilotoa loop?
There are plenty of hostels along the Quilotoa Loop, with some varying in terms of luxury or what is included. This goes from your usual hostel to hot tubs! Most hostels are listed online. My recommendations on where to stay on the Quilotoa hike are as follows:
- Insilivi – Hostel Taita Cristobel (good value) or JuJu Llama (the most popular option).
- Chugchilán- Hostal Cloud Forest (well-reviewed, also the cheapest option at the time of writing), or Mama Hilda (a beautiful accommodation option with delicious food)
- Quilotoa- Hostal Chukirawa. Price goes up here, as, after all, you are sleeping right by Quilotoa lake. We felt this was the best option.
How fit do you need to be?
This is one of the best multi-day hikes in Ecuador to start with. Why? Because you can hike with a day-pack, still stay in comfy accommodation, and the way is relatively easy to follow.
Plus, it is a good acclimatisation hike because you gain and lose elevation each day, with the lowest elevation of the Quilotoa hike being: and the highest: 3390m. You can also hike in reverse from Quilotoa to Sigchos, which is slightly easier to take (see route options below).
Despite this, I would say it should not be taken lightly. We acclimatized at 2500m for a week beforehand, yet I still felt the altitude on day one. Having a base level of fitness, only carrying what you need, and taking steps to manage altitude sickness is essential.
Is the quilotoa loop safe?
This is a well-trodden route and attracts many tourists. In general, reports for crime around this area are low, and the most dangerous part is the risk of altitude sickness. However, as always, crime can happen anywhere. Some villages have a police station, and communities deal with crime in the villages.
There was one incident where I was glad I was with someone, as a solo female hiker with a lot of experience hiking solo. On day one, a young man was hovering in the bushes and came out masturbating behind me. Fortunately, my friend was ahead and yelled in Spanish, asking, what are you doing. He proceeded to leave. The police happened to pass us when we reached the road, and we told them what had happened.
Asides from this, I felt the route was safe, and the communities were welcoming. If you are solo, especially as a woman, please take the necessary precautions as always to reduce risk.
Also, watch for the odd stray dog. Pretending to pick up a rock (or actually doing so) usually stops them from getting close to you. If they continue, throw the rock in front of them.
Having hiking poles also helps as you can point them to keep a distance between you and the dog.
Will I get lost on the quilotoa loop?
Maybe, as there is a lack of signage at times. But Maps. me is a good source if you follow it. The main places to get lost hiking the Quilotoa Loop are as follows:
- Day One: Turn left when you see the path leading down the hill, with a sign on the right
- Day One: Turn left at Hostal Estela
- Day Two: Pay attention during the first five minutes of the hike and where to turn down into the valley
- Day Three: Follow the signs to Quilotoa to a avoid a steep and at times complicated finale to the crater rim
How do I get there?
Take a bus to Latacunga (you can keep your main bag here), then take a bus to Sigchos. In return, you can catch a bus from Quilotoa village to Latacunga.
Another option is to arrange private transport. For car owners, it is a tricky one because of the different start and endpoints. You could drive to Latacunga and find a place to park your car. We got someone to drive the car for us.
What is the weather like?
Weather at Quilotoa crater is often unpredictable, and cloud cover or rain is likely. We had sunny days but cold nights in September. The hiking season is generally considered June- September.
What is the elevation of the quilotoa loop?
It varies, as previously mentioned. The highest point is 3,914 meters on the crater rim.
Are there other quilotoa hikes?
Yes. You could do the Quilotoa as a day hike by just walking around the crater. Or, there are other things to do at Quiltoa. For example, walk down to the lake, take a boat or kayak, or bike around.
You could also do the Quilotoa Loop in two, three, or four days.
Can you swim at quilotoa lake?
Apparently, the lake water is quite acidic, and naturally, cold. People do not recommend swimming due to the volcanic make-up of the water, but locals say it is possible, and there are videos of people online doing so.
Wildlife?
We did not see much (of course, dogs), but there were birds to spot. There is no fish in Quilotoa Lake, just algae.